How to build steps with pavers – Patio steps that build from pavers offers functional yet aesthetic path access to connect two different points at your residence.
If you’re planning to construct steps on your patio for your home, there are really thousands of materials that you can use for this project.
Perhaps one of the most distinctive and popular covers pavers. As these outdoor paving stones look basic and rough at first glance, they’re functional yet aesthetic as well.
It is good to know the advantages of using pavers in order to create a convenient access for your residence.
-

build steps with pavers
| Pros | Cons |
|---|---|
| 1. Aesthetic appeal: Paver steps can enhance the overall look of your outdoor space. | 1. Cost: Paver steps can be more expensive compared to other materials such as concrete. |
| 2. Versatility: Pavers come in various shapes, sizes, and colors, allowing for creative design possibilities. | 2. Installation time: Building steps with pavers may require more time and effort compared to precast steps. |
| 3. Durability: Pavers are known for their durability and ability to withstand heavy loads and harsh weather conditions. | 3. Maintenance: Pavers may require occasional maintenance, such as weed removal and resealing, to maintain their appearance. |
| 4. Flexibility: Pavers can be easily replaced individually if damaged, making repairs more convenient. | 4. Slippery surface: Some pavers may become slippery when wet, potentially posing a safety hazard. |
| 5. DIY-friendly: Paver steps can be a suitable option for those who enjoy do-it-yourself projects. | 5. Unevenness: Over time, pavers may shift or settle, causing the steps to become uneven if not properly installed. |
| 6. Eco-friendly: Many pavers are made from recycled materials, contributing to sustainable building practices. | 6. Limited load capacity: Pavers may have a lower load capacity compared to materials like concrete, making them unsuitable for certain applications. |
Adding steps with pavers to your outdoor space not only enhances its functionality but also adds aesthetic appeal.
Whether you’re looking to connect different levels of your garden or create a beautiful entryway, building steps with pavers can be a rewarding DIY project.
Read how to build steps with pavers below to get a deeper insight into the matter. It may help you to build sturdy and safe steps as your own project.
In this article, we will guide you through the process, covering each step from planning and design to the site preparation. So, let’s get started!

1. Planning And Design:
Before you begin building steps with pavers, it’s essential to carefully plan and design the project. Here’s what you need to consider:

- Determine the desired location and dimensions of the steps: Identify the ideal spot for your steps and measure the available space. Consider factors such as accessibility and the overall layout of your outdoor area.
- Consider the slope, existing landscaping, and regulations: Take into account the slope of the land to ensure proper drainage and stability. Evaluate any existing landscaping features that may impact the design. Additionally, check if there are any local permits or regulations you need to comply with.
- Sketch a design or use design software: Create a sketch of the desired step layout or utilize design software to visualize how the pavers will look in your space. This step will help you determine the pattern and layout of the pavers before moving forward.
2. Gather Materials And Tools / Evaluate The Shape, Size, and Material
Once you have a clear plan in place, it’s time to gather the necessary materials and tools. Here’s what you’ll need:

a.Measure the area and calculate materials:Measure the length, width, and height of the steps to determine the number of pavers required. Calculate the amount of base material (such as crushed stone or gravel), sand, and adhesive or jointing compound needed for the project.
b. Purchase materials: Visit a local supplier to purchase the pavers, base material, sand, and adhesive. Ensure you choose pavers that are suitable for outdoor use and complement your existing landscape.
c. Gather tools: Prepare the necessary tools for the project, including a shovel, level, rubber mallet, trowel, tape measure, and safety equipment such as gloves and protective eyewear. Having the right tools at hand will make the construction process more efficient.
Building patio steps typically require two main measurements, which are the rise/height and the run/distance. When it comes to building steps with pavers, the shape, size, and material of the pavers are important considerations. Here’s a closer look at each of these factors:
- Shape: Pavers come in a variety of shapes, including rectangular, square, and round. For building steps, rectangular pavers are often the most popular choice because they can be easily laid in a straight line to create a solid and stable foundation. However, if you want a more decorative look, you may want to consider using different shapes and laying them in a pattern.
- Size: The size of the pavers you choose will depend on the size of the steps you want to build. Generally, larger pavers will be more stable and easier to walk on, but smaller pavers can be used to create intricate patterns and designs. Common sizes for pavers used in step construction include 12″ x 12″, 12″ x 24″, and 18″ x 18″.
- Material: Pavers can be made from a variety of materials, including concrete, clay, and natural stone. Concrete pavers are often the most affordable option, but they can be prone to cracking over time. Clay pavers are more durable than concrete, but they can be more expensive. Natural stone pavers are the most expensive option, but they are also the most durable and can add a beautiful, natural look to your steps.
Ultimately, the shape, size, and material of the pavers you choose for your step construction will depend on your personal preferences and the specific requirements of your project.
It’s important to consider factors like durability, safety, and aesthetics when making your selection.


3. Prepare The Site:
Proper site preparation is crucial for the success and longevity of your paver steps. Follow these steps to ensure a solid foundation:
a. Clear the area: Remove any vegetation, rocks, or debris from the designated area. Clearing the site will provide a clean canvas for construction.
b. Excavate the soil: Dig into the ground to the required depth, considering the thickness of the base material and pavers. Make sure the excavation is level, taking into account the slope if applicable.
c. Compact the soil: Use a hand tamper to compact the soil firmly. This step helps to create a stable foundation for your paver steps. Ensure the compacted soil is level and even to maintain the integrity of the structure.
4. Lay the pavers to mimic the steps construction
Set a row of blocks as the lowest part of the steps. Then lay another row above the first layer with a slight overlap section between both.
- Step 1:
Prepare the base. Start by excavating the area where you want to lay the pavers. Make sure to dig down to the appropriate depth and level the base using a rake and a hand tamper or plate compactor. Add a layer of gravel or crushed stone to create a stable foundation for the pavers, and use a level to ensure that the base is even.
- Step 2:
Add a layer of sand. Spread a layer of sand over the base, using a rake to ensure that it is evenly distributed. Use a level to make sure that the sand layer is also even.
- Step 3:
Lay the first course of pavers. Start at the bottom of the steps and lay the first course of pavers. Use a level to ensure that the pavers are level and even. Make sure to leave a small gap between each paver to allow for drainage and to prevent them from shifting.
- Step 4:
Continue laying the pavers. Continue laying the pavers for each course, making sure to stagger the joints between each paver for added stability. Use a rubber mallet to gently tap each paver into place and ensure that they are level.
- Step 5:
Cut the pavers to fit. If you need to cut any of the pavers to fit around curves or corners, use a circular saw with a diamond blade or a chisel and hammer to carefully cut the pavers to size.
- Step 6:
Secure the pavers. Once all the pavers have been laid, use a plate compactor to gently tamp them down and ensure that they are securely in place. Fill any gaps between the pavers with sand and sweep off any excess sand with a broom.
- Step 7:
Finishing touches. Add any finishing touches, such as edging or lighting, to complete the look of your steps. Following these steps will help you lay pavers to mimic the steps construction and create a beautiful and functional set of steps.
read more:
- How to Lay Patio Pavers on Dirt : Easy DIY Project at Home [Details]
- 95 Best Small Apartment Patio Ideas You’ll Love in 2021
- 22 Best Popular Apartment Patio Ideas and Themes
5. Affix each row of the paver steps
Starting from the very bottom, remove the paving slabs, and put a thick cement adhesive layer (about ½ inch inside the traced area). Lay and press the block down into the top of cement adhesive of pavers’ rows.
To affix each row of paver steps, you will need some additional materials such as paver adhesive and a caulking gun. Here are the steps to affix each row of paver steps:
Step 1:
Make sure that the base and the first row of pavers are level and stable before proceeding. You can use a level to check the levelness of the first row of pavers.
- Step 2:
Apply the paver adhesive to the top surface of the first row of pavers. Start at one end of the row and apply a continuous bead of adhesive along the length of the row, about 1/4 inch from the edge.
- Step 3:
Press the second row of pavers onto the adhesive. Start at one end of the row and press the pavers firmly onto the adhesive, making sure that they are level with the first row. Use a rubber mallet or a block of wood to tap the pavers into place.
- Step 4:
Repeat steps 2 and 3 for each subsequent row of pavers, making sure to apply adhesive to the top of the previous row before pressing the next row into place.
- Step 5:
Allow the adhesive to dry. Depending on the type of adhesive you are using, you may need to allow it to dry for several hours or overnight before continuing.
- Step 6:
Fill in any gaps between the pavers. Use a jointing sand or mortar to fill in any gaps between the pavers, and use a broom or a brush to sweep off any excess sand or mortar.
Affixing each row of paver steps will help to create a more stable and secure set of steps, and can help to prevent the pavers from shifting or becoming dislodged over time. Make sure to follow the manufacturer’s instructions when using paver adhesive, and wear gloves and safety glasses to protect yourself during the process.
read also:
- How to Make a Brick Patio on Uneven Ground
- Natural Stone Patio – “The Best Outdoor Yard Ideas”
- Best Choice About Alumawood Patio Cover and Things to Consider

pavers
6. Repeat The Process
The next step on how to build steps with pavers is to install the remaining steps of the pavers. Build them by using the exact same procedure as the first.
You can repeat the process of applying paver adhesive and affixing each row of pavers until you have completed the desired number of rows for your steps. Here are the steps to repeat the process:
- Step 1:
Check that the previous row is level and stable. Use a level to check that the previous row of pavers is level and stable before proceeding.
- Step 2:
Apply the paver adhesive to the top surface of the previous row of pavers. Start at one end of the row and apply a continuous bead of adhesive along the length of the row, about 1/4 inch from the edge.
- Step 3:
Press the next row of pavers onto the adhesive. Start at one end of the row and press the pavers firmly onto the adhesive, making sure that they are level with the previous row. Use a rubber mallet or a block of wood to tap the pavers into place.
- Step 4:
Repeat steps 2 and 3 for each subsequent row of pavers, making sure to apply adhesive to the top of the previous row before pressing the next row into place.
- Step 5:
Allow the adhesive to dry. Depending on the type of adhesive you are using, you may need to allow it to dry for several hours or overnight before continuing.
- Step 6:
Fill in any gaps between the pavers. Use a jointing sand or mortar to fill in any gaps between the pavers, and use a broom or a brush to sweep off any excess sand or mortar.
Repeat the process of applying paver adhesive and affixing each row of pavers until you have completed the desired number of rows for your steps. Make sure to check the levelness and stability of each row before proceeding to the next one.
Read more:
- 22 Best Natural Landscaping Ideas with Pavers – Inspira Building
- Proper Hanging Lamp Installation to Fill the Modern and Minimalist Room
- Build Traditional House with Various Ethnic Styles
- How to Build Paver Steps to Patio – With Sample Designs
7. Fill in-between The Pavers and Steps
Well, once you have completed to base the paver steps and wait for it to dry for about 2 to 4 hours, it is time to fill the visible gaps. Inspect each of the layers and visible gaps to prevent weed growth.
Fill the edge of the pavers too if you don’t use capstones.
Filling in-between the pavers and steps is an important step to finish the project and create a stable, safe and attractive set of steps. Here are the steps to fill in-between the pavers and steps:
- Step 1:
Clean the surface of the pavers and steps. Use a broom, brush or leaf blower to remove any debris, dirt, or excess sand or mortar from the surface of the pavers and steps.
- Step 2:
Apply a layer of jointing sand. Use a trowel or scoop to apply a layer of jointing sand over the surface of the pavers and steps. Make sure to fill in all of the gaps between the pavers and steps.
- Step 3:
Sweep off any excess sand. Use a broom or brush to sweep off any excess sand from the surface of the pavers and steps. Make sure that the joints between the pavers and steps are completely filled with sand.
- Step 4:
Compact the sand. Use a tamper or plate compactor to compact the sand into the joints between the pavers and steps. This will help to create a more stable and secure set of steps.
- Step 5:
Repeat steps 2 to 4 if necessary. Depending on the depth of the joints and the size of the pavers and steps, you may need to repeat steps 2 to 4 to ensure that the joints are completely filled with sand and are stable.
- Step 6:
Apply a sealer (optional). If you want to protect the pavers and steps from staining and weather damage, you can apply a sealer over the surface of the pavers and steps. Follow the manufacturer’s instructions for the sealer you choose to apply.
By filling in-between the pavers and steps, you will help to prevent weeds, erosion and water damage. It will also create a more stable, secure and attractive set of steps that can last for many years.
source: Courtesy of Youtube
read also:
- Few Steps To Build Best Design Outdoor Fireplaces with Patio
- Patio covers Orange County – Best Choice for Home Design Ideas
- Pool and Patio – Inspiring Ideas You Need at Home
- How to Lay Paving Stone – “Outdoor & Garden Ideas”, Inspira Building

pavers
Read More:
- Easy To Follow Guide – How to Lay Paving Slabs on a Slope
- 43 Best Home Goods Patio Furniture for A Perfect Cozy & Modern Patio
- Top 53 Best Swimming Pool Landscaping Ideas | Home & Backyard
pavers
Whether your paver’s steps are just a small project or a larger one with a bigger area, knowing how to build steps with pavers is necessary.ers
By incorporating paving, you would get a texture, and color to add to the exterior design of your house. It also helps that this material is relatively affordable and available widely.
Pavers are useful for many reasons. A concrete example would be steps to elevate a house above the ground, or long walls to separate rooms. Paving can be labor intensive, expensive, and time consuming both physically and logistically. However pavers can provide a concrete step to elevate a house (or other structure) by providing a stability on top of the surface surface and giving us a place to place stones or other materials as desired.
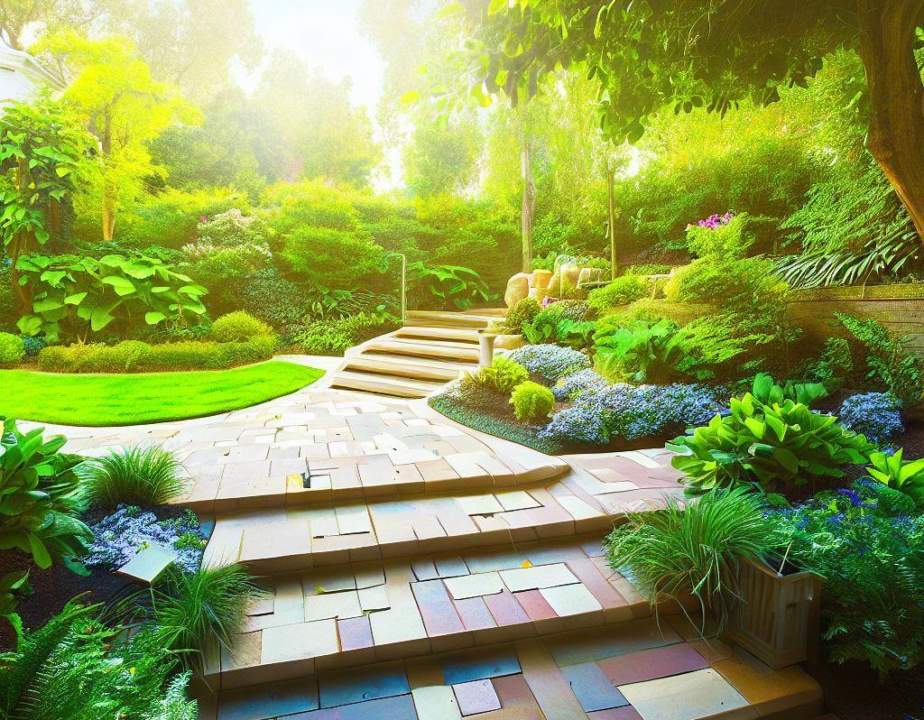
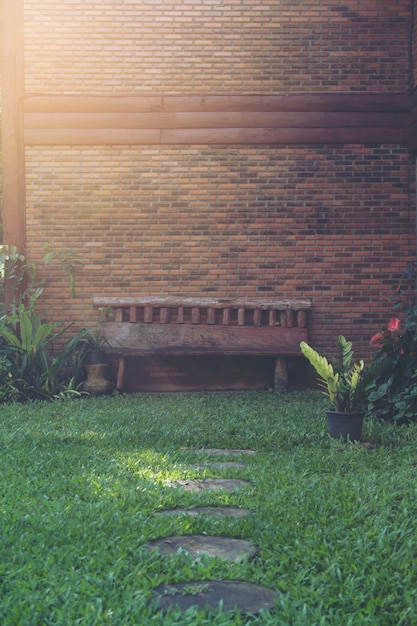
8. Example Steps With Pavers Images & Patterns


