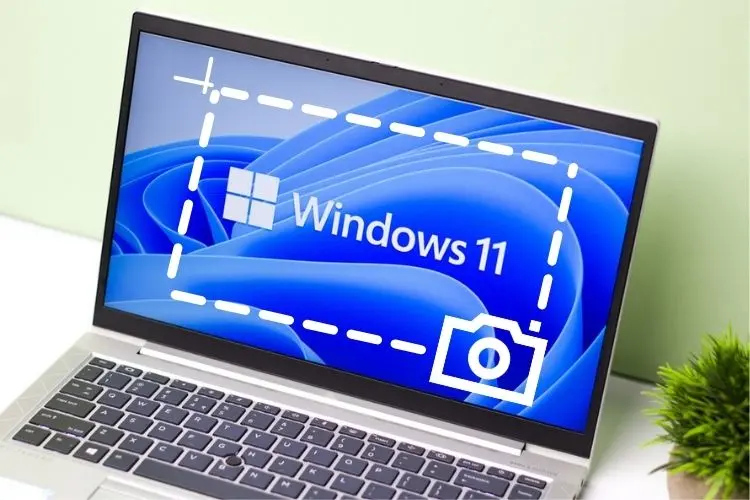
A screenshot on a laptop is a captured image of the content displayed on the laptop screen at a specific moment in time. Taking a screenshot can be useful for a variety of reasons, such as capturing an error message, documenting a software bug, or saving an important document.
To take a screenshot on a laptop, there are usually several methods depending on the operating system you are using.
Why We Need To Screenshot on Laptop
[divider style=”dashed” top=”20″ bottom=”20″]
There are several reasons why someone may want to take a screenshot on their laptop, including:
- Documenting information: Taking a screenshot is a quick and easy way to document information that is displayed on your laptop screen. This can be useful if you need to refer to the information later or if you need to share the information with others.
- Capturing errors: If you encounter an error message or a software bug, taking a screenshot of the error can be helpful when seeking assistance or troubleshooting the issue.
- Saving important documents: If you are working on an important document or project, taking a screenshot can be a way to save a snapshot of your progress at a specific point in time.
- Sharing content: Screenshots can be shared with others to illustrate a point or to provide visual context. This can be useful in professional or personal settings, such as when sharing a presentation or discussing a project with colleagues.
Overall, taking a screenshot on a laptop is a simple and effective way to capture information, troubleshoot issues, and share content with others.
How to Screenshot On Hp Laptop
[divider style=”dashed” top=”20″ bottom=”20″]
There are several methods you can use to take a screenshot on an HP laptop, depending on your specific model and operating system. Here are a few common methods:
- Using the Print Screen key: Press the “PrtSc” (Print Screen) key on your keyboard to capture an image of the entire screen. The screenshot will be saved to your clipboard, and you can paste it into an image editor or document.
- Using the Windows key + Print Screen key: Press the “Windows” key and the “PrtSc” key simultaneously to capture an image of the entire screen. The screenshot will be saved to your “Pictures” folder in a subfolder called “Screenshots.”
- Using the Snipping Tool: Search for the “Snipping Tool” in the Start menu and open it. Click “New” to capture a new screenshot, then drag the cursor to select the area of the screen you want to capture. The screenshot will be saved to your clipboard, and you can paste it into an image editor or document.
- Using the Windows key + Shift + S key: Press the “Windows” key, the “Shift” key, and the “S” key simultaneously to capture a selected area of the screen. This will open the “Snip & Sketch” tool, which allows you to draw a rectangle around the area you want to capture. The screenshot will be saved to your clipboard, and you can paste it into an image editor or document.
These are just a few common methods for taking a screenshot on an HP laptop. The specific method you use may depend on your laptop model and operating system.
How to Screenshot on Dell Laptop
[divider style=”dashed” top=”20″ bottom=”20″]
There are several ways to take a screenshot on a Dell laptop, depending on the model and operating system you are using. Here are a few common methods:
- Using the Print Screen key: Press the “PrtSc” (Print Screen) key on your keyboard to capture an image of the entire screen. The screenshot will be saved to your clipboard, and you can paste it into an image editor or document.
- Using the Windows key + Print Screen key: Press the “Windows” key and the “PrtSc” key simultaneously to capture an image of the entire screen. The screenshot will be saved to your “Pictures” folder in a subfolder called “Screenshots.”
- Using the Windows key + Shift + S key: Press the “Windows” key, the “Shift” key, and the “S” key simultaneously to capture a selected area of the screen. This will open the “Snip & Sketch” tool, which allows you to draw a rectangle around the area you want to capture. The screenshot will be saved to your clipboard, and you can paste it into an image editor or document.
- Using the Dell Capture app: Some Dell laptops come with a pre-installed app called “Dell Capture” or “Dell Webcam Central” that can be used to take screenshots. Open the app, select “Capture,” and choose the type of screenshot you want to take (full screen, window, or area). The screenshot will be saved to your Pictures folder.
These are just a few common methods for taking a screenshot on a Dell laptop. The specific method you use may depend on your laptop model and operating system.
read also: How to Screenshot on Samsung Tablet – Easy Tutorial
Overall, How to Screenshot on Laptop
[divider style=”dashed” top=”20″ bottom=”20″]
Taking a screenshot on a laptop is a simple process and can be done using several methods depending on the operating system you are using. Here’s an overview of the most common methods for taking a screenshot on a laptop:
1. Using the Print Screen Key
Press the “PrtSc” (Print Screen) key on your keyboard to capture an image of the entire screen.

To take a screenshot using the Print Screen (PrtScn) key on your keyboard, follow these steps:
- Make sure that the content you want to capture is displayed on your screen.
- Locate the Print Screen key on your keyboard. It’s usually located in the top row of keys, near the F12 key.
- Press the Print Screen key once. This will capture an image of your entire screen and copy it to the clipboard.
- Open an image editing program like Microsoft Paint or Adobe Photoshop.
- In the image editing program, click on “Paste” or press the Ctrl + V keys on your keyboard. This will paste the screenshot from the clipboard onto the canvas.
- Save the screenshot as an image file (such as a JPEG or PNG) by selecting “Save As” from the File menu.
That’s it! Your screenshot is now saved as an image file that you can use and share as needed.
2. Using the Windows key + Print Screen key
Press the “Windows” key and the “PrtSc” key simultaneously to capture an image of the entire screen.

To take a screenshot using the Windows key + Print Screen key on your keyboard, follow these steps:
- Make sure that the content you want to capture is displayed on your screen.
- Press the Windows key + Print Screen key at the same time. This will capture an image of your entire screen and automatically save it as a PNG image in the default Screenshots folder in your Pictures library.
- Open the Screenshots folder in your Pictures library to find the saved screenshot. You can also access this folder by typing “Screenshots” in the Windows search bar.
That’s it! Your screenshot is now saved as an image file that you can use and share as needed.
read more: Easy Guide: How to Take Screenshot on Mac Easily
[divider style=”dashed” top=”20″ bottom=”20″]
3. Using The Windows key + Shift + S key
Press the “Windows” key, the “Shift” key, and the “S” key simultaneously to capture a selected area of the screen. This will open the “Snip & Sketch” tool, which allows you to draw a rectangle around the area you want to capture.

To take a screenshot using the Windows key + Shift + S key on your keyboard, follow these steps:
- Make sure that the content you want to capture is displayed on your screen.
- Press the Windows key + Shift + S key at the same time. This will bring up the Snip & Sketch tool, which allows you to capture a specific area of your screen.
- Click and drag your mouse to select the area of the screen that you want to capture.
- Once you release the mouse button, the captured screenshot will be copied to the clipboard.
- Open an image editing program like Microsoft Paint or Adobe Photoshop.
- In the image editing program, click on “Paste” or press the Ctrl + V keys on your keyboard. This will paste the screenshot from the clipboard onto the canvas.
- Save the screenshot as an image file (such as a JPEG or PNG) by selecting “Save As” from the File menu.
That’s it! Your screenshot is now saved as an image file that you can use and share as needed.
[divider style=”dashed” top=”20″ bottom=”20″]
4. Using the Snipping Tool or similar app
Open the “Snipping Tool” or a similar app (such as “Snip & Sketch” on Windows or “Screenshot” on Mac) and select the type of screenshot you want to take (full screen, window, or area).

To take a screenshot using the Snipping Tool in Windows, follow these steps:
- Open the Snipping Tool. You can do this by searching for “Snipping Tool” in the Windows search bar.
- Click on “New” to start a new snip.
- Select the type of snip you want to take from the drop-down menu. You can choose from four different types: Free-form snip, Rectangular snip, Window snip, or Full-screen snip.
- Once you have selected the type of snip you want to take, use your mouse to select the area of the screen you want to capture.
- After you’ve made your selection, the snipped image will open in the Snipping Tool editor.
- From the editor, you can annotate the image, save it as an image file, or copy it to the clipboard to paste it into another application.
- To save the image, click on “File” and select “Save As”. Choose the location where you want to save the file, and select the file format (such as JPEG or PNG).
That’s it! Your screenshot is now saved as an image file that you can use and share as needed.
read also: How to Screenshot on Samsung Tablet – Easy Tutorial
[divider style=”dashed” top=”20″ bottom=”20″]
5. Using a third-party app or extension
There are also several third-party apps and browser extensions available that can be used to take screenshots on a laptop.
Overall, taking a screenshot on a laptop is a simple and useful tool for capturing information, troubleshooting issues, and sharing content with others.

Third-party software for screenshots refers to any software or application that is not built into the operating system, such as Windows or Mac OS.
These third-party applications are designed specifically for taking screenshots and often offer more advanced features and customization options compared to the built-in options.
Some popular third-party applications for taking screenshots include:
- Snagit: This is a powerful screenshot and screen recording software that offers a wide range of capture options and editing tools.
- Greenshot: This is a free, open-source screenshot tool that allows you to capture screenshots and annotate them with text and shapes.
- Lightshot: This is a free screenshot tool that allows you to capture screenshots and quickly edit and share them.
- PicPick: This is a full-featured screen capture tool that allows you to capture screenshots, edit them, and save them in a variety of formats.
- Nimbus Screenshot and Screen Video Recorder: This is a free Google Chrome extension that allows you to capture screenshots, record video of your screen, and annotate your captures with text and shapes.
Using third-party screenshot software can be a good option if you need more advanced features or customization options than what is available with the built-in options.
read more:
- How to View Saved Jobs on LinkedIn in Various Devices – Easy Guide
- How to Uninstall Skype for Business | Easy Tutorial & DIY
- Easy Guide: How to Take Screenshot on Mac Easily
In Conclusion,
[divider style=”dashed” top=”20″ bottom=”20″]
Taking screenshots on a laptop is a useful feature that allows you to capture images of what’s displayed on your screen. There are several ways to take screenshots on a laptop, including using the Print Screen key, Windows key + Print Screen key, Windows key + Shift + S key, or the Snipping Tool. Each method has its own advantages and limitations.
If you need more advanced features or customization options, you may want to consider using third-party screenshot software such as Snagit, Greenshot, Lightshot, PicPick, or Nimbus Screenshot and Screen Video Recorder.
Regardless of which method you choose, taking screenshots on a laptop is a quick and easy way to capture images of your screen, which can be useful for a variety of purposes, such as creating tutorials, documenting technical issues, or sharing information with others.